---
title: Display Conditions
description: Conditional block visibility using display conditions in Templatical email templates.
---
# Display Conditions
Display conditions allow users to change block visibility based on conditions. When a condition is applied to a block, the renderer wraps its output in the conditional syntax you define (e.g., Liquid `{% if %}` / `{% endif %}`). The conditions pass through unchanged — your sending platform or templating engine should render them before sending.
## Configuration
Define available conditions through the editor config:
```ts
import { init } from '@templatical/editor';
const editor = await init({
container: '#editor',
displayConditions: {
conditions: [
{
label: 'VIP Customers',
before: '{% if customer.vip == true %}',
after: '{% endif %}',
description: 'Only shown to VIP customers',
},
{
label: 'Has Active Subscription',
before: '{% if subscription.active %}',
after: '{% endif %}',
description: 'Shown when user has an active subscription',
},
],
},
});
```
## DisplayCondition type
```ts
interface DisplayCondition {
label: string;
before: string;
after: string;
group?: string;
description?: string;
}
```
| Property | Required | Description |
|----------|----------|-------------|
| `label` | Yes | Display name shown in the editor UI |
| `before` | Yes | Markup inserted before the block output |
| `after` | Yes | Markup inserted after the block output |
| `group` | No | Group name for organizing conditions in the dropdown |
| `description` | No | Explanatory text shown below the label |
## DisplayConditionsConfig
```ts
interface DisplayConditionsConfig {
conditions: DisplayCondition[];
allowCustom?: boolean;
}
```
When `allowCustom` is `true`, users can write their own `before` and `after` strings directly in the editor instead of choosing from the predefined list. Defaults to `false`.
## Grouping conditions
Use the `group` property to organize conditions into logical sections. Groups appear as labeled sections in the condition picker dropdown.
```ts
displayConditions: {
allowCustom: true,
conditions: [
{
label: 'VIP Partners',
before: '{% if customer.vip %}',
after: '{% endif %}',
group: 'Audience',
},
{
label: 'Free Users',
before: '{% if customer.plan == "free" %}',
after: '{% endif %}',
group: 'Audience',
},
{
label: 'Enterprise',
before: '{% if customer.plan == "enterprise" %}',
after: '{% endif %}',
group: 'Audience',
},
{
label: 'Beta Testers',
before: '{% if customer.beta %}',
after: '{% endif %}',
group: 'Audience',
},
{
label: 'Early Bird',
before: '{% if registration.early_bird %}',
after: '{% endif %}',
group: 'Registration',
},
{
label: 'Speakers',
before: '{% if role == "speaker" %}',
after: '{% endif %}',
group: 'Role',
},
],
}
```
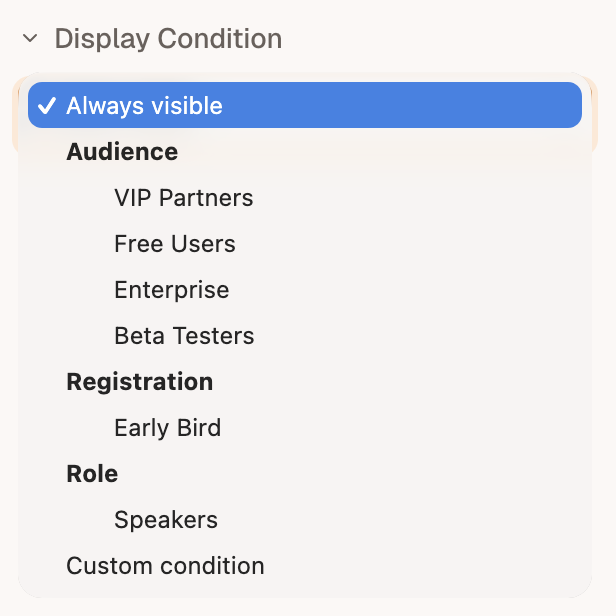 The `before` and `after` fields accept any string, so you can use any templating syntax your platform supports — Liquid, Handlebars, AMPscript, Jinja2, or anything else.
## How conditions affect output
When a block has a display condition assigned, the renderer wraps the block's HTML output with the `before` and `after` strings:
```html
{% if customer.vip == true %}
The `before` and `after` fields accept any string, so you can use any templating syntax your platform supports — Liquid, Handlebars, AMPscript, Jinja2, or anything else.
## How conditions affect output
When a block has a display condition assigned, the renderer wraps the block's HTML output with the `before` and `after` strings:
```html
{% if customer.vip == true %}
|
|
{% endif %}
```
The editor and renderer treat the `before` and `after` strings as opaque — they are inserted exactly as defined.
## Applying conditions in the editor
Users select a display condition from the block settings panel. Each block can have at most one display condition. In the editor canvas, blocks with conditions show a filter icon so it's easy to see which content is conditional at a glance.
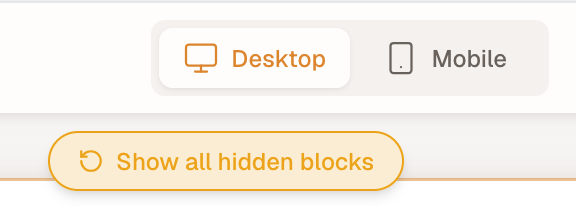
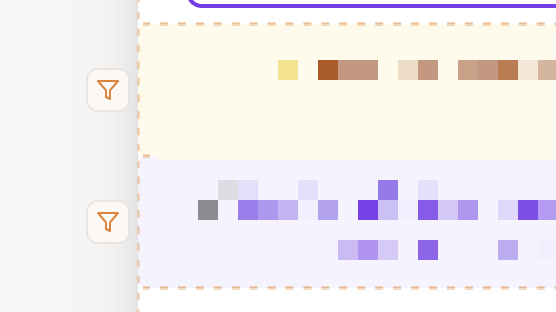 Clicking the filter icon hides the block, simulating a falsy condition. This lets users preview how the template looks when certain conditional blocks are not visible. When any block is hidden this way, a restore button appears in the editor to bring all hidden blocks back.
 ### Evaluating conditions for real
The filter icon **simulates** a falsy condition — it's a manual what-if, and nothing checks the condition against data. To have conditions actually evaluated, wire the [`resolvePreview`](/guide/preview-rendering) hook: your backend receives the template and can omit blocks whose condition doesn't hold for a given recipient, so the preview shows the real variation rather than one you toggled by hand.
While a resolver is showing the preview, the filter icon and the restore button step aside — the resolver has already checked each condition against real data, so a hand-toggled hide would override the answer you asked for. Your hidden blocks come back when you leave the preview.
::: tip Checking each variation
Two ways, and they answer different questions:
- **[Preview Rendering](/guide/preview-rendering)** — wire `resolvePreview` and each variation renders in the editor, without sending anything. Fastest loop while authoring, and the only one that shows a variation for a recipient you can't mail.
- **[Test emails](/backend/test-email)** — send to different recipient profiles and confirm each renders in a real inbox. Slower, but it exercises your platform's own evaluation and the mail client, which no preview can.
:::
### Evaluating conditions for real
The filter icon **simulates** a falsy condition — it's a manual what-if, and nothing checks the condition against data. To have conditions actually evaluated, wire the [`resolvePreview`](/guide/preview-rendering) hook: your backend receives the template and can omit blocks whose condition doesn't hold for a given recipient, so the preview shows the real variation rather than one you toggled by hand.
While a resolver is showing the preview, the filter icon and the restore button step aside — the resolver has already checked each condition against real data, so a hand-toggled hide would override the answer you asked for. Your hidden blocks come back when you leave the preview.
::: tip Checking each variation
Two ways, and they answer different questions:
- **[Preview Rendering](/guide/preview-rendering)** — wire `resolvePreview` and each variation renders in the editor, without sending anything. Fastest loop while authoring, and the only one that shows a variation for a recipient you can't mail.
- **[Test emails](/backend/test-email)** — send to different recipient profiles and confirm each renders in a real inbox. Slower, but it exercises your platform's own evaluation and the mail client, which no preview can.
:::